之前我们部署k8s多master高可用集群中使用的代理均衡器是nginx,这次我们使用haproxy来做负载均衡器,之前的笔记也会用到,可以查看之前的笔记:https://sulao.cn/post/953.html
直接从之前笔记中的安装nginx处开始,由于此处是使用haproxy替代原来的nginx,所以我们直接安装haproxy,本次笔记和上述笔记基本一致,只有nginx/haproxy和keepalived处略有不同
yum install haproxy -y
安装完成以后我们现手工添加VIP
ip addr add 192.168.1.78/24 dev eth0
haproxy直接使用以下haproxy.cfg的配置,haproxy的配置字段介绍可以查看这个笔记:https://sulao.cn/post/746.html
cat /etc/haproxy/haproxy.cfg
global
    log         127.0.0.1 local2
    chroot      /var/lib/haproxy
    pidfile     /var/run/haproxy.pid
    maxconn     4000
    user        haproxy
    group       haproxy
    daemon
    stats socket /var/lib/haproxy/stats
defaults
    mode                    http
    log                     global
    option                  httplog
    option                  dontlognull
    option http-server-close
    option                  redispatch
    retries                 3
    timeout http-request    10s
    timeout queue           1m
    timeout connect         10s
    timeout client          1m
    timeout server          1m
    timeout http-keep-alive 10s
    timeout check           10s
    maxconn                 3000
listen master
    bind 0.0.0.0:16443
    mode tcp
    option tcplog
    balance roundrobin
    server master1 192.168.1.72:6443 check inter 2000 fall 2 rise 2 weight 1
    server master2 192.168.1.73:6443 check inter 2000 fall 2 rise 2 weight 1
    server master3 192.168.1.74:6443 check inter 2000 fall 2 rise 2 weight 1
然后设置开机启动并启动
systemctl enable haproxy
systemctl start haproxy
接着我们配置haproxy,keepalived我们还是使用单播非抢占模式进行配置
修改三个master节点的/etc/keepalived/keepalived.conf文件
cat /etc/keepalived/keepalived.conf
global_defs {
   router_id R1
   script_user root
   enable_script_security
}

vrrp_script chk_haproxy {
    script "/etc/keepalived/check.sh"
    interval 3
}

vrrp_instance VI_1 {
    state BACKUP #另外两个master节点也填写BACKUP
    interface eth0 #根据每个节点的网卡名字进行修改
    virtual_router_id 51 #主从填写一致 VRID
    nopreempt
    priority 100 #优先级,其他的backup要小于这个值
    advert_int 1
    authentication {
        auth_type PASS
        auth_pass 1111
    }
    unicast_src_ip 192.168.1.72 #填写本机IP
    unicast_peer {
        192.168.1.73   #另外的keepalived节点IP,如果有多个keepalived就写多行,我这里有三个keeplived节点
        192.168.1.74
    }

    virtual_ipaddress {
        192.168.1.78/24 #VIP
    }
    track_script {
        chk_haproxy #调用检测脚本
    }
}
check.sh脚本内容如下
cat /etc/keepalived/check.sh
#!/bin/bash
if [ "$(ps -ef |grep haproxy |grep -v grep)" == "" ]
then
  systemctl restart haproxy
  sleep 2
  if [ "$(ps -ef |grep haproxy |grep -v grep)" == "" ]
  then
    pkill -f keepalived
  fi
fi
接着我们设置keepalived开机启动并启动
systemctl enable keepalived
systemctl start keepalived
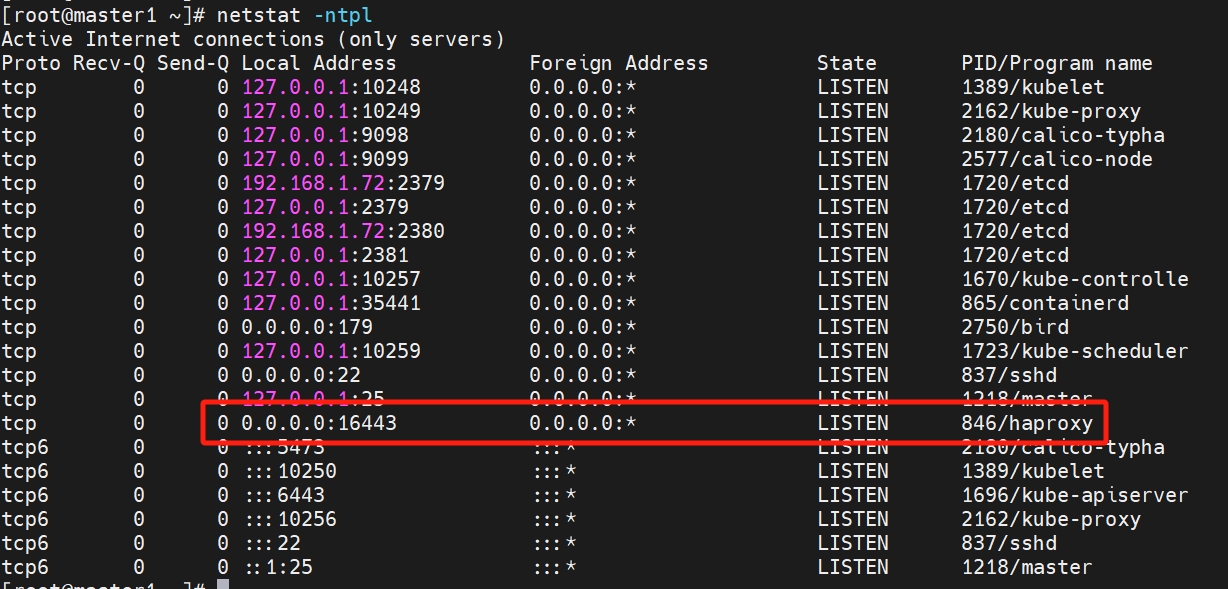
启动以后我们可以查看16443端口

