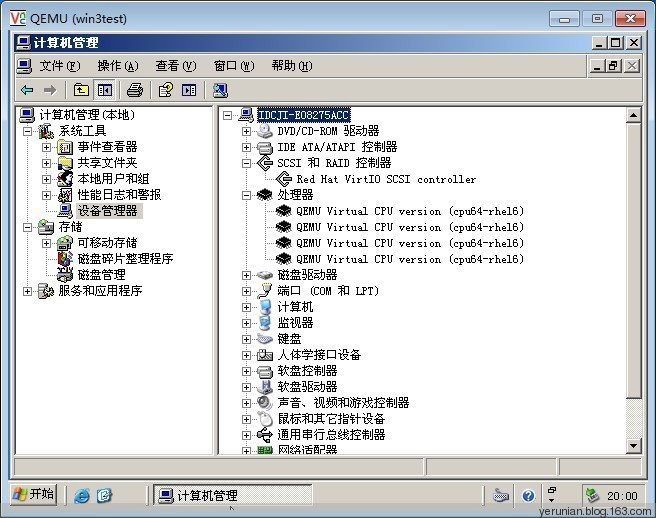
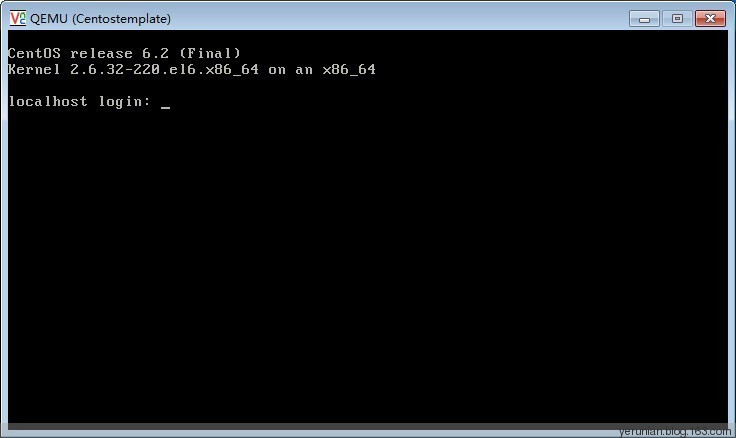
KVM(基于内核的虚拟机)是一款为类 Linux 系统提供的开源的全虚拟化解决方案,KVM 使用虚拟化扩展(如 Intel VT 或 AMD-V)提供虚拟化功能。无论何时我们在任何 Linux 机器上安装 KVM,都会通过加载诸如 kvm-intel.ko(基于 Intel 的机器)和 kvm-amd.ko(基于 amd 的机器)的内核模块,使其成为管理程序hyervisor(LCTT 译注:一种监控和管理虚拟机运行的核心软件层)。
KVM 允许我们安装和运行多个虚拟机(Windows 和 Linux)。我们可以通过 virt-manager 的图形用户界面或使用 virt-install 和 virsh 命令在命令行界面来创建和管理基于 KVM 的虚拟机。
本文介绍如何安装KVM,在宿主机上如何安装操作系统,添加分离磁盘,软驱,光驱和更改ISO镜像文件,如何克隆Guest系统主机。
一、检查CPU是否支持虚拟化。(在主板BIOS中开启CPU的VirtualizationTechnology)
#uname -a
Linux localhost.localdomain 2.6.32-358.2.1.el6.x86_64 #1 SMP Wed Mar 13 00:26:49 UTC 2013 x86_64 x86_64 x86_64 GNU/Linux
#grep -E -o 'vmx|svm' /proc/cpuinfo
vmx
二、安装kvm
#yum -y install qemu-kvm libvirt python-virtinst bridge-utils
或者
#yum -y groupinstall 'Virtualization' 'Virtualization Client' 'Virtualization Platform' 'Virtualization Tools'
查看模块
#lsmod | grep kvm
kvm_intel              53484  6
kvm                   316506  1 kvm_intel
a.网卡桥接配置
#cat /etc/sysconfig/network-scripts/ifcfg-em1
DEVICE="em1"
BOOTPROTO="none"
HWADDR="00:24:E8:60:49:66"
ONBOOT="yes"
TYPE="Ethernet"
IPADDR=192.168.18.138
NETMASK=255.255.255.192
GATEWAY=192.168.18.129
DNS1=202.102.134.68
DNS2=202.102.128.68
IPV6INIT=no
USERCTL=no
BRIDGE=br0

#cat /etc/sysconfig/network-scripts/ifcfg-br0
DEVICE="br0"
BOOTPROTO="none"
HWADDR="00:24:E8:60:49:66"
ONBOOT="yes"
TYPE="Bridge"
IPADDR=192.168.18.138
NETMASK=255.255.255.192
GATEWAY=192.168.18.129
DNS1=202.102.134.68
DNS2=202.102.128.68
IPV6=no
USERCTL=no
重启网卡
/etc/init.d/network restart
#ip route list
192.168.18.128/26 dev br0  proto kernel  scope link  src 192.168.18.138
192.168.122.0/24 dev virbr0  proto kernel  scope link  src 192.168.122.1
169.254.0.0/16 dev br0  scope link  metric 1006
default via 192.168.18.129 dev br0

#brctl show
bridge name     bridge id               STP enabled     interfaces
br0             8000.0024e8604966       no              em1
virbr0          8000.52540098e2ed       yes             virbr0-nic
b.创建虚拟机(创建宿主机的Guest系统)Guest系统可以是linux 或者windows等系统
我们使用管理工具virt-install
创建存储镜像目录
#mkdir -p /home/kvm/images
安装guest操作系统
#virt-install --connect qemu:///system \
-n win2003 \
-r 1024 \
--vcpus=2 \
--disk path=/home/kvm/images/win2003.img,cache=writeback,size=10 \
-c /home/iso/WIN_2003.iso \
--vnc --vnclisten=0.0.0.0 --vncport=5901 --noautoconsole \
--os-type windows \
--accelerate --network bridge=br0 \
--hvm --os-variant=win2k3
下面对virt-install命令做简单介绍,详细可以查看
#virt-install  --help
--connect=URI
连接到虚拟机管理程序与libvirt的URI,如qemu:///system
-r MEMORY, --ram=MEMORY
分配虚拟机实例(Guest)内存,单位为M
-n NAME, --name=NAME
虚拟机实例(Guest)的名称
--vcpus=VCPUS
配置实例(Guest)CPU数目
--disk path=DISKFILE
指定实例(Guest)存储路径及其镜像
-c CDROM, --cdrom=CDROM
指定安装镜像所在位置和名称, 它可以是一个ISO映像的路径, 它也可以是一##个URL,从中提取/访问的最小引导ISO映像。
--vnc
启用VNC远程管理,该选项不被赞同,可以用"--graphics vnc,..."代替
--vnclisten=VNCLISTEN
可以用"--graphics vnc,listen=LISTEN,..." 代替
--vncport=VNCPORT
可以用"--graphics vnc,port=PORT,..."代替
--noautoconsole
不要自动尝试连接到guest虚拟机控制台。默认行为是启动一个VNC客户端显##示的图形控制台
--os-type=OS_TYPE
优化实例(Guest)配置操作系统类型如linux或windows
--os-variant=OS_VARIANT
优化实例(Guest)配置一个特定的操作系统(如##win7,winxp,win2k3,win2k8,rhel6)
--hvm
要求使用完全虚拟化
--accelerate
加速该选项已经过时可以参考--virt-type qemu
-w NETWORK, --network=NETWORK,opt1=val1,opt2=val2
实例(Guest)连接到主机的网络, 网桥--network bridge=br0,用nat路由出站##--network network=default
列表(Guest) win2003
virsh -c qemu:///system list --all
启动Guest) win2003
virsh -c qemu:///system start win2003
关闭(Guest) win2003
virsh -c qemu:///system destroy win2003
编辑(Guest) win2003配置文件xml
virsh -c qemu:///system edit win2003
删除(Guest) win2003
virsh -c qemu:///system undefine win2003
man virsh 可以了解命令
三、我们来创建实例(Guest)win3test
1)首先创建磁盘镜像文件,
文件格式qcow2格式是kvm支持的标准格式,raw格式为虚拟磁盘文件通用格式。
创建文件名win3test.qcow2的磁盘镜像文件名,文件格式为qcow2,磁盘大小为10G
#qemu-img create -f qcow2 /home/kvm/images/win3test.qcow2 15G
Formatting '/home/kvm/images/win3test.qcow2', fmt=qcow2 size=16106127360 encryption=off cluster_size=65536
#qemu-img info /home/kvm/images/win3test.qcow2
image: /home/kvm/images/win3test.qcow2
file format: qcow2
virtual size: 15G (16106127360 bytes)
disk size: 264K
cluster_size: 65536
2)内存1G,2核CPU ,15G硬盘安装window 2003系统
virt-install --connect qemu:///system \
--name win3test \
--ram 1024 \
--vcpus=2 \
--disk path=/home/kvm/images/win3test.qcow2,device=disk,format=qcow2,bus=ide,cache=writeback,size=15 \
--cdrom /home/iso/WIN_2003.iso --os-type=windows \
--network bridge=br0,model=virtio,model=e1000 \
--hvm --os-variant=win2k3 \
--graphics vnc,listen=0.0.0.0,port=5902 \
--virt-type=kvm \
--noautoconsole

四、我们来创建实例(Guest)linuxtest。
1)创建文件名linuxtest.qcow2的磁盘镜像文件,文件格式为qcow2,磁盘大小为73G
#qemu-img create -f qcow2 /home/kvm/images/linuxtest.qcow2 73G
Formatting '/home/kvm/images/linuxtest.qcow2', fmt=qcow2 size=78383153152 encryption=off cluster_size=65536
##=======================================================
#qemu-img info /home/kvm/images/linuxtest.qcow2
image: /home/kvm/images/linuxtest.qcow2
file format: qcow2
virtual size: 73G (78383153152 bytes)
disk size: 136K
cluster_size: 65536
##=========================================================
2)内存4G,4核CPU ,73G硬盘安装centos 6.4 64位系统
#virt-install --connect qemu:///system \
--name linuxtest \
--ram 4096 \
--vcpus=4 \
--disk path=/home/kvm/images/linuxtest.qcow2,device=disk,format=qcow2,bus=virtio,cache=none,size=73 \
--location='http://mirrors.163.com/centos/6.4/os/x86_64/' \
--os-type=linux \
--network bridge=br0,model=virtio,model=e1000 \
--hvm --os-variant=rhel6 \
--graphics vnc,listen=0.0.0.0,port=5903 \
--virt-type=kvm \
--noautoconsole
4)virtio半虚拟化驱动来提高性能(微软操作系统的IO性能)
下面安装Windows server 2003 Enterprise
wget http://alt.fedoraproject.org/pub/alt/virtio-win/latest/images/bin/virtio-win-0.1-52.iso
wget http://www.linuxwind.org/download/virtio-win-0.1-52.tar.gz
##解压
tar zxvf virtio-win-0.1-52.tar.gz
安装系统的时候记得按F6从软驱加载驱动
内存4G,4核CPU ,15G硬盘安装windows server 2003系统
#virt-install --connect qemu:///system \
--name win3test \
--ram 4096 \
--vcpus=4 \
--disk path=/home/kvm/images/win3test.qcow2,device=disk,format=qcow2,bus=virtio,cache=none,size=15 \
--cdrom /home/iso/WIN_2003.iso --os-type=windows \
--disk path=/home/iso/virtio-WIN2003-x86.vfd,device=floppy,perms=rw \
--network bridge=br0,model=virtio,model=e1000 \
--hvm --os-variant=win2k3 \
--graphics vnc,listen=0.0.0.0,port=5902 \
--virt-type=kvm \
--noautoconsole
##===================================

win3test.xml如下
#cat /etc/libvirt/qemu/win3test.xml
<!--
WARNING: THIS IS AN AUTO-GENERATED FILE. CHANGES TO IT ARE LIKELY TO BE
OVERWRITTEN AND LOST. Changes to this xml configuration should be made using:
  virsh edit win3test
or other application using the libvirt API.
-->

<domain type='kvm'>
  <name>win3test</name>
  <uuid>9fd1785e-430a-2aa7-050a-ed76247c7e64</uuid>
  <memory unit='KiB'>4194304</memory>
  <currentMemory unit='KiB'>4194304</currentMemory>
  <vcpu placement='static'>4</vcpu>
  <os>
    <type arch='x86_64' machine='rhel6.4.0'>hvm</type>
    <boot dev='hd'/>
  </os>
  <features>
    <acpi/>
    <apic/>
    <pae/>
  </features>
  <clock offset='localtime'>
    <timer name='rtc' tickpolicy='catchup'/>
  </clock>
  <on_poweroff>destroy</on_poweroff>
  <on_reboot>restart</on_reboot>
  <on_crash>restart</on_crash>
  <devices>
    <emulator>/usr/libexec/qemu-kvm</emulator>
    <disk type='file' device='disk'>
      <driver name='qemu' type='qcow2' cache='none'/>
      <source file='/home/kvm/images/win3test.qcow2'/>
      <target dev='vda' bus='virtio'/>
      <address type='pci' domain='0x0000' bus='0x00' slot='0x04' function='0x0'/>
    </disk>
    <disk type='file' device='floppy'>
      <driver name='qemu' type='raw' cache='none'/>
      <source file='/home/iso/virtio-WIN2003-x86.vfd'/>
      <target dev='fda' bus='fdc'/>
      <address type='drive' controller='0' bus='0' target='0' unit='0'/>
    </disk>
    <disk type='file' device='cdrom'>
      <driver name='qemu' type='raw'/>
      <source file='/home/iso/WIN_2003.iso'/>
      <target dev='hdc' bus='ide'/>
      <readonly/>
      <address type='drive' controller='0' bus='1' target='0' unit='0'/>
    </disk>
    <controller type='usb' index='0'>
      <address type='pci' domain='0x0000' bus='0x00' slot='0x01' function='0x2'/>
    </controller>
    <controller type='fdc' index='0'/>
    <controller type='ide' index='0'>
      <address type='pci' domain='0x0000' bus='0x00' slot='0x01' function='0x1'/>
    </controller>
    <interface type='bridge'>
      <mac address='52:54:00:cc:a1:bd'/>
      <source bridge='br0'/>
      <model type='e1000'/>
      <address type='pci' domain='0x0000' bus='0x00' slot='0x03' function='0x0'/>
    </interface>
    <serial type='pty'>
      <target port='0'/>
    </serial>
    <console type='pty'>
      <target type='serial' port='0'/>
    </console>
    <input type='tablet' bus='usb'/>
    <input type='mouse' bus='ps2'/>
    <graphics type='vnc' port='5902' autoport='no' listen='0.0.0.0'>
      <listen type='address' address='0.0.0.0'/>
    </graphics>
    <video>
      <model type='vga' vram='9216' heads='1'/>
      <address type='pci' domain='0x0000' bus='0x00' slot='0x02' function='0x0'/>
    </video>
    <memballoon model='virtio'>
      <address type='pci' domain='0x0000' bus='0x00' slot='0x05' function='0x0'/>
    </memballoon>
  </devices>
</domain>
##=============================
先关机分离软驱
#virsh -c qemu:///system destroy win3test
#virsh detach-disk win3test fda --persistent
成功分离磁盘
4)克隆备份虚拟机
a)克隆windows server 2003模板
#virt-clone --original win3test --name 03template --file /home/kvm/images/03template.qcow2
或者
#virt-clone \
--original win3test \
--name 2003template \
--file /home/kvm/images/2003template.qcow2
编辑配置03template.xml修改vnc端口修改为5905
#vi /etc/libvirt/qemu/03template.xml
1)添加分离磁盘
启动(Guest)win3test
#virsh -c qemu:///system start win3test
创建磁盘格式raw,添加磁盘 vdb
#qemu-img create -f raw /home/kvm/images/vm-add.img 1G
成功热加载vdb硬盘,硬盘在系统上能正常使用
#virsh attach-disk win3test /home/kvm/images/vm-add.img vdb \
--cache none –persistent
分离磁盘vdb
#virsh detach-disk win3test vdb --persistent
关闭(guest)win3test
#virsh -c qemu:///system destroy win3test
##添加IDE硬盘,文件格式qcow2(系统开启来后无法使用新增磁盘,应该是BUG)
#qemu-img create -f qcow2 /home/kvm/images/vm-add.qcow2 1G
#virsh attach-disk win3test /home/kvm/images/vm-add.qcow2 hde \
--cache none --persistent --subdriver qcow2
分离IDE磁盘关,闭系统后操作
#virsh detach-disk win3test hde --persistent
(guest)win3test关机状态的时候能成功添加,但是启动报错,应该是BUG
#virsh attach-disk win3test /home/kvm/images/vm-add.qcow2 vdb \
--address pci:0000.00.06.0 --persistent \
--driver qemu --subdriver qcow2 --sourcetype file
virsh # start win3test
错误:开始域 win3test 失败
错误:
internal error Process exited while reading console log output: char device redirected to /dev/pts/0
qemu-kvm: -drive file=/home/kvm/images/vm-add.qcow2,if=none,id=drive-virtio-disk1,format=qcow2: could not open disk image /home/kvm/images/vm-add.qcow2: Invalid argument
分离vdb磁盘
#virsh detach-disk win3test vdb --persistent
(guest)win3test开机状态添加磁盘成功,但是磁盘无法读写。因为磁盘文件为qcow2
#virsh attach-disk win3test /home/kvm/images/vm-add.qcow2 vdb \
--persistent
##分离磁盘
#virsh detach-disk win3test vdb --persistent
成功分离磁盘
2)添加分离软驱
添加fda软盘(guest)win3test关机后操作
#virsh attach-disk win3test /home/iso/virtio-WIN2003-x86.vfdfda \
--type floppy –persistent
分离fda软驱
#virsh detach-disk win3test fda --persistent
成功分离磁盘
3)添加分离光驱
##添加分离光驱(guest)win3test关机后操作
#virsh detach-disk win3test hdc --persistent
成功分离磁盘
##加载光驱
#virsh attach-disk win3test /home/iso/WIN_2003.iso hdc \
--type cdrom –persistent
换iso镜像文件
#virsh change-media win3test hdc /home/iso/virtio-win-0.1-52.iso
succeeded to complete action update on media
弹出镜像文件
#virsh change-media win3test hdc --eject
b)克隆Centos 6.2系统模板
#virt-clone \
--original linuxtest \
--name Centostemplate \
--file /home/kvm/images/Centostemplate.qcow2
列表guest系统
#virsh -c qemu:///system list --all
 Id    名称                         状态
----------------------------------------------------
 -     linuxtest                      关闭
 -     win3test                       关闭
#virt-clone \
> --original linuxtest \
> --name Centostemplate \
> --file /home/kvm/images/Centostemplate.qcow2
正在克隆 linuxtest.qcow2                             | 2.0 GB     00:05

Clone 'Centostemplate' created successfully.
编辑xml修改vnc端口修改为5904
#virsh -c qemu:///system edit Centostemplate

#cat /etc/libvirt/qemu/Centostemplate.xml
<!--
WARNING: THIS IS AN AUTO-GENERATED FILE. CHANGES TO IT ARE LIKELY TO BE
OVERWRITTEN AND LOST. Changes to this xml configuration should be made using:
  virsh edit Centostemplate
or other application using the libvirt API.
-->

<domain type='kvm'>
  <name>Centostemplate</name>
  <uuid>8b5f02f2-ee18-376a-4388-3e8ffff64c06</uuid>
  <memory unit='KiB'>4194304</memory>
  <currentMemory unit='KiB'>4194304</currentMemory>
  <vcpu placement='static'>4</vcpu>
  <os>
    <type arch='x86_64' machine='rhel6.4.0'>hvm</type>
    <boot dev='hd'/>
  </os>
  <features>
    <acpi/>
    <apic/>
    <pae/>
  </features>
  <clock offset='utc'/>
  <on_poweroff>destroy</on_poweroff>
  <on_reboot>restart</on_reboot>
  <on_crash>restart</on_crash>
  <devices>
    <emulator>/usr/libexec/qemu-kvm</emulator>
    <disk type='file' device='disk'>
      <driver name='qemu' type='qcow2' cache='none'/>
      <source file='/home/kvm/images/Centostemplate.qcow2'/>
      <target dev='vda' bus='virtio'/>
      <address type='pci' domain='0x0000' bus='0x00' slot='0x04' function='0x0'/>
    </disk>
    <controller type='usb' index='0'>
      <address type='pci' domain='0x0000' bus='0x00' slot='0x01' function='0x2'/>
    </controller>
    <interface type='bridge'>
      <mac address='52:54:00:47:13:79'/>
      <source bridge='br0'/>
      <model type='e1000'/>
      <address type='pci' domain='0x0000' bus='0x00' slot='0x03' function='0x0'/>
    </interface>
    <serial type='pty'>
      <target port='0'/>
    </serial>
    <console type='pty'>
      <target type='serial' port='0'/>
    </console>
    <input type='tablet' bus='usb'/>
    <input type='mouse' bus='ps2'/>
    <graphics type='vnc' port='5904' autoport='no' listen='0.0.0.0'>
      <listen type='address' address='0.0.0.0'/>
    </graphics>
    <video>
      <model type='cirrus' vram='9216' heads='1'/>
      <address type='pci' domain='0x0000' bus='0x00' slot='0x02' function='0x0'/>
    </video>
    <memballoon model='virtio'>
      <address type='pci' domain='0x0000' bus='0x00' slot='0x05' function='0x0'/>
    </memballoon>
  </devices>
</domain>
##===================================
启动Centostemplate
#virsh -c qemu:///system start Centostemplate

#virsh -c qemu:///system list --all
 Id    名称                         状态
----------------------------------------------------
 22    Centostemplate                 running
 -     linuxtest                      关闭
 -     win3test                       关闭
用VNC连接
登陆进系统删除网卡的MAC和70-persistent-net.rules然后重启机器(这样网卡不会冲突能启动)
#rm /etc/udev/rules.d/70-persistent-net.rules

关闭(Guest) Centostemplate
#virsh -c qemu:///system destroy Centostemplate
删除(Guest) Centostemplate
#virsh -c qemu:///system undefined Centostemplate
关于网桥,查看mac地址
#brctl showmacs br0
网桥设置mac生存期
#brctl setageing br0 30
xml虚拟机配置文件目录
#/etc/libvirt/qemu
